
Saturday, December 24, 2022
It's That Time Again...
We'll return to normal blogging next week, but first: The annual posting of the two greatest Christmas songs of all time.
Merry Christmas to all!
Monday, December 19, 2022
Thank You!
The Subaru Repair fundraiser/sweepstakes is officially over. I'll be removing the donation button soon, but if you still want to donate, feel free to use the "Lincoln Bedroom" widget on the sidebar👉👉
Margaret and I want to thank all who entered/donated. Your generosity is greatly appreciated. The final tally is the one on the sidebar "thermometer" ( $550) That's 55 entries among 22 donors.
I hope to livestream the drawing over Facebook on Tuesday. I'll try and give ample acvance notice.
Again, thank you all very much!
Sunday, December 18, 2022
Less Than 8 Hours To Go!

Have you entered to win some photographic prizes, and to help us defray some of the repair costs to our vehicle? By the way, got the car back two days ago (finally), and it runs like new!
As you can see by the gauge above, it doesn't appear we'll make the goal by the witching hour tonight. I'd like to propose a modest goal in the interim of 50% ($400). That's just another $40. Hmmm, maybe too modest. But let's try.
For all the entry, and prize details, just scroll down to the previous blog posts. Every thing you need to know is spelled out there. But I realize, I haven't shown you the 2nd and 3rd place prizes. (Because I didn't have them.. now I do!). The second place winner will get a 10 pack of note cards with the same image as the grand prize, and the third place winner, a 5 pack. Here they are:

Printed on "velvet metallic" paper, these prints look nearly as awesome as the metal print the grand prize winner will receive. Each card can be opened for the sender's message, and of course, includes a mailing envelope. (The prints can also be removed- carefully- from the card and put in a frame if you so desire)
DRAWING DETAILS-
I was hoping to draw tomorrow (the 19th) but will be in Las Cruces most of the day, so tentatively plan to see the results on Tuesday, and how's this for exciting: I'm going to try and live stream the drawing on Facebook! My "photo bro" Dale is tasked with the job of pulling the names out of the hat, or can, or box, or whatever they end up in.
So, what are you waiting for? Let's hit the new low target and maybe win yourselves some cool photos. Click right here:
Tuesday, December 13, 2022
Time Is Running Out!
 |
| Win this metal print, and help me get this car running again! |
First off, many many thanks for those who have already entered/donated. Your generosity is most appreciated. We've made progress to the goal of $800, but we've still got a ways to go. And don't forget, that if the goal is reached, I will change the metal print to a larger size. The lucky winner will love that.
All the pertinent details are in the preceding blog post 👇👇👇
Remember, the deadline is MIDNIGHT (MST), DECEMBER 18!
Please share this post far and wide. I'm pretty sure a contributing factor to the slow start is Facebook's infamous algorithms... enough people arent seeing the posts. I'm counting on you to spread it around.
Again, donate by clicking on the picture at the top of the sidebar👉👉👉 or use this handy QR code:
.png)
Tuesday, December 06, 2022
A (Very Personal) Fund Raiser!
Yes, you've seen this image here before. You're not mistaken. But there's a new reason to display it once again. As you may or may not recall, a couple weeks ago the timing belt in the Subaru broke, and though I immediately pulled over to the shoulder of (busy) US 180, several valves were bent in the process, so while a new belt is only $40 and probably a hundred bucks labor to replace, replacing the valves involves more. A whole lot more.
Let Car Wizard explain why...
So, yeah, my estimate to get the car (which we really like, and which had replaced the Focus as the daily driver) came to $3,067.89 including tax. My mechanic, good guy that he is, didn't mind me sourcing my own parts, so I've managed to get the bill down to around $2,500 of which $1,820 is the labor (again, watch the video).
So, what's with the picture, Dan? I imagine I hear you asking. Well, I'm asking for your help in defraying the crippling costs of this repair (it's been a costly autumn), and while I could do a GoFundMe campaign, it's not like this is a person clinging to death, or a beloved dog with a shattered femur is it. It seems like GoFundMe's make people feel guilty if they don't donate, and I don't want that.
Here's what I decided to do. I'm going to have a small sweepstakes. I know that the image above was one of my most popular on Instagram and Facebook, and I always thought, if it looks good on this screen, I bet it'd be a screamer if I had it printed on metal! And it is...


If I was going to sell this setup, I would charge around $150, plus shipping. This is going to be the grand prize in the "Subaru Repair Fund Sweepstakes"! I want to keep it real around Christmas time, so entries are only $10. I'm hoping for a significant number of donors so am encouraging single entries, but there'scertainly no rule (I'm writing the rules) against multiples. A $20 donation = 2 entries, and so on.
My goal is $800 which means I need 80 entries. Seems very doable. Now, how will I choose a winner? It will be a random draw, by computer. See this screen grab? It's from a random number generator website I found with Google (of course). On the left are the numbers 1-500 randomized (yeah, I'm optimistic!). When I receive your donation, it will be assigned a number from the list beginning with.jpg)
the first number. The second donation will receive the second number. $20, $30 donations will be assigned the next two or three numbers, and so on. When entries close, at midnight MST on December 18. I will ask the number generator to give me three numbers (yes, there will be additional prizes!) between 1-x (where x=total number of entries). The donors with those numbers, in the order the computer displays them, will be the grand prize, 2nd, and 3rd prize winners respectively.
.jpg)
the first number. The second donation will receive the second number. $20, $30 donations will be assigned the next two or three numbers, and so on. When entries close, at midnight MST on December 18. I will ask the number generator to give me three numbers (yes, there will be additional prizes!) between 1-x (where x=total number of entries). The donors with those numbers, in the order the computer displays them, will be the grand prize, 2nd, and 3rd prize winners respectively.
MAKE SENSE?
Where to donate? Right here on this blog, at the top of the sidebar you will find a donate button that will take you to PayPal. You do not need a PayPal account. Or use the handy QR code at the bottom of this post. All major credit and debit cards are accepted by Pay Pal. (If you're morally or spiritually opposed to PayPal or something, DM me and I'll send you a Zelle money request from my Credit Union)
To review: THE DETAILS:
- Fund raiser/sweepstakes will run from right now till midnight MST, Dec 18, 2022
- Suggested Donations $10. (Additional $10 donations never turned down, LOL)
- Make donations using button at the top of ths sidebar, this blog. (a QR code will be available on other social media sites)
- Your entry number(s) assigned in order from the above list.
- Drawing will be held on December 19th, probably around lunchtime😜
- Winner will be announced on the blog, and other social media sites,and by email (if available)
- Grand Prize: 8x12 metal print pictured above, retail value $150*
- 2nd Prize: 10 pack, same image metal surface paper on embossed notecards w/envelopes
- 3rd Prize: 5 pack of same.
HERE'S A BONUS! IF... If the $800 goal is reached, I will double the size of the Grand Prize metal print to 16x24! A $300 value! And I will keep the 8x12 and hang it here in the man cave... because I love it.
Questions? If not, Get set. B̶A̶K̶E̶!̶ DONATE!

Monday, November 28, 2022
Time Is Running Out...
Price is never going to be this low again* Get Luminar Neo with all the 2022 extensions, and bonus goodies NOW!

*in my opinion, of course.
Friday, November 25, 2022
Help Our Bookstore! Here's Way Number 2
Here's another way to help us with our $3000 auto repair.... You know Readers Cove sells used books. But what if you're looking for new books for yourselves, or for holiday gifts. Use the book seller that supports small, independent business like ours, and skip Bezos's elephant in the room.
Use Bookshop.org. Margaret explains below:
"Shopping for a new book? Choose Readers' Cove Used Books & Gallery as your local bookstore when ordering. Bookshop.org supports independent businesses!"
Help Our Bookstore! Here's Way Number 1:
Margaret says:
"Our audiobook fans can support us by shopping libro.fm with this link: www.libro.fm/holiday?bookstore=readercove. I highly recommend 2 that I recently listened to: Braiding Sweetgrass by Robin Wall Kemmerer and Horse by Geraldine Brooks."
Wednesday, November 23, 2022
So Many Tools, Dan, Do I Have To Use Them All?
Of course not.
We can all tend to fall into that trap. There are so many sliders, extensions, conversions, and what-nots in every editing program and Luminar Neo is no exception. It's ease to go, "if I use them all, I'll get a really good finished image". Wrong. If you use them all properly, that's often true. But there are some very intuitive, and simple tools in Neo that will give you an excellent result, and it won't take you more than a couple minutes.
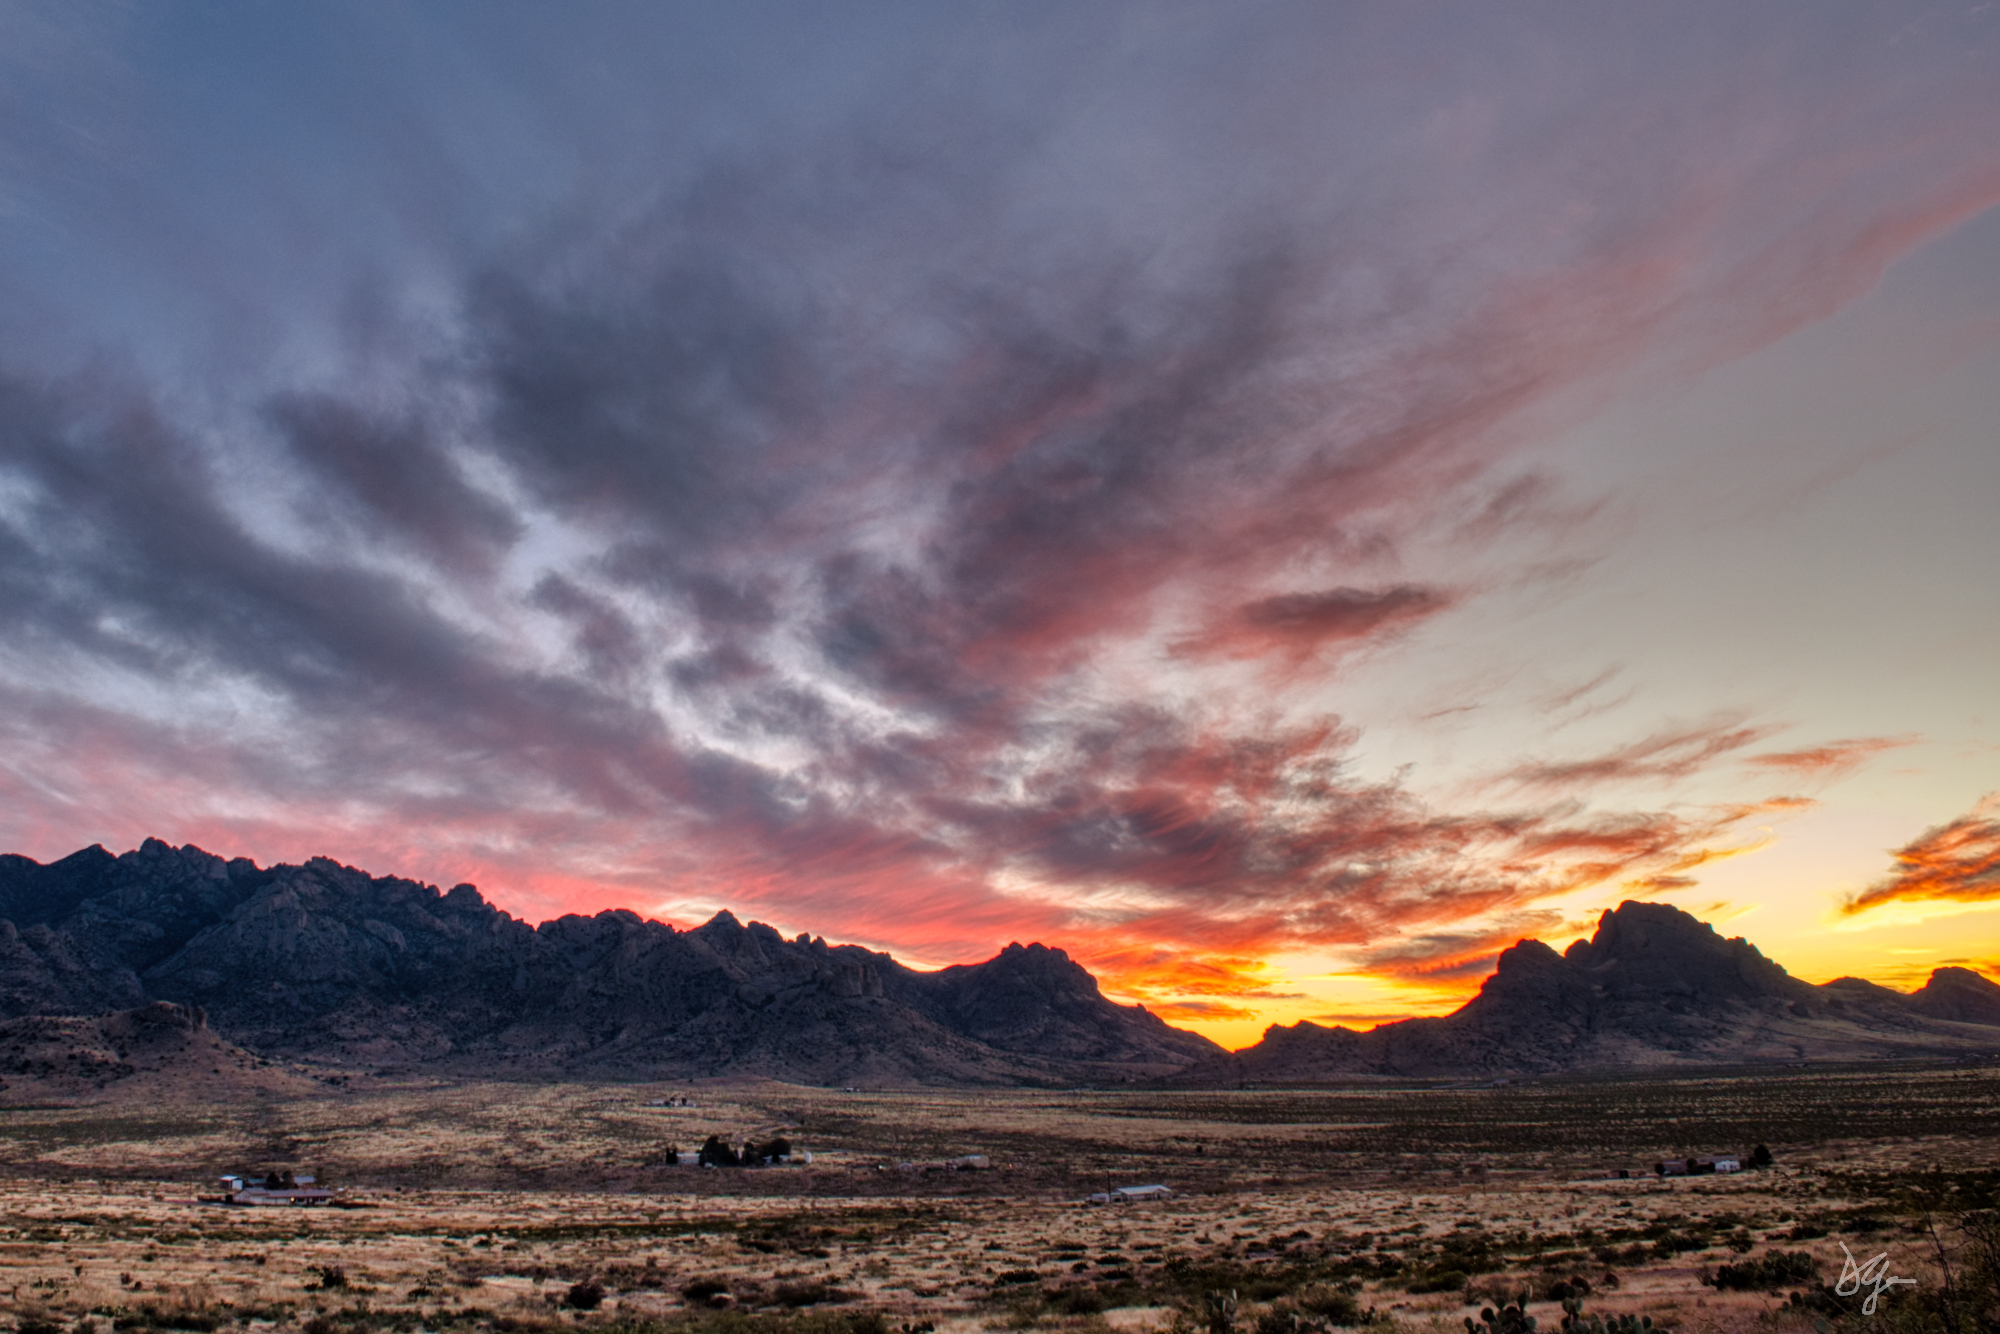
I did a test. Here's the beginning image, taken in the evening, just after sunset. I wanted to lighten up the foreground, and bring up the pink in the clouds.
 |
| ©Daniel Gauss/Shot On Site |
Ordinarily, I'd use a large part of the Luminar tool box to get the result I'm looking for, but in this test, I wanted to see how few tools I needed. So here's a screen shot of the edit history:
.png)
I noticed one of the houses in the foreground was a little distracting, so I used the Erase tool to get rid of it.
Then, I used the first key tool: The HDR Merge Extension. I simply dragged the catalog image to the HDR Merge box, (it's primarily used to merge several exposures of the same image, but it works great for single images as well!), pressed "Merge", and the AI did the tone mapping and spit out a giant TIF file which looked exactly how I'd hoped it would. I could have called in done then and there, but there was one more AI tool I needed to really pop those pink clouds: Enhance AI. (PRO TIP: In a pinch, this is often the only tool you need for a great looking photo).
I was done, so how many tools was that? Five. And it took probably 2 minutes from start to finish.
Ope! I forgot the last tool.. I used the Layers tool to add a .png file of my initials in the lower right corner. So 6 tools. And here's the finished product:
 |
| ©Daniel Gauss/Shot On Site |
So, the moral of the story? If you're in a time crunch, or you just don't want to sit hunched over your keyboard, staring at your monitor on a beautiful day, there are tools here that can get you the result you want in just minutes.
You can now get Luminar Neo, and all the extensions, plus some sweet bonuses for ridiculously low prices during the Black Friday/Cyber Monday sales period. Use the discount code: DANGAUSS at checkout for an additional $10 off.
Posts may contain affiliate links. If you make a purchase through one of these, I may receive a small commission at no increased cost to you. Thanks.
Monday, November 21, 2022
I Don't Pay A Fortune For Quality Cycling Wear... (A Black Friday Story)


"Why is cycling (and other fitness) clothing so damned expensive?"
Take the jacket and tights I'm wearing in the above images- they were less than $90 for the pair! If I purchased similar micro-fleece tights, and cycling jacket from one of the major brands, like Castelli, or Assos, or Rapha, I'd be shelling out $300 to $600... or more! And most of them wouldn't even have side pockets to put my cold hands in!
So what's the secret. For that, I've got to take you back a dozen years, or thereabouts. Back then, when I went riding, I always... always wore lycra shorts, and standard short sleeve poly cycling jersey with the 3 large pockets in the rear. I never rode when it was below 65°F. I wanted to find more comfortable "cruising" clothing items. I went searching Amazon for urban and mountain biking shorts. What I found was even better. I found a pair of lightweight boxer briefs with a chamois. (Ask your cycling friends). Why was this better? I could wear them under any of my baggy gym shorts, cargo shorts, or sweat pants, or anything really, and still be comfortable on the saddle. These boxer briefs were from a company I'd never heard of (true of most everything on Amazon), called Baleaf Oh yeah- they were only about $14 then. $16 now.👉

Yeah, fun with QR codes....
For the next 10 years or so, they were the only Baleaf item I owned.. and eventually I reverted back to wearing regular cycling clothing for my rides, having picked up some extra shorts, and jerseys from various cheap outlets. Picked up a windbreaker from REI Coop outlet website, bib shorts from Nashbar, and chamois-less tights from the bike shop in Las Cruces, so my riding temperature threshold dropped to around 55°. Perfect for late Fall in southern New Mexico.
I didn't give much of a thought about Baleaf then. As far as I knew they made the boxer brief cycling underwear, and not much else. Then they showed up in a Facebook ad .. they were promoting their bib shorts, which is another item that is way overpriced from the other clothing suppliers. You're lucky if you can find some on clearance under $100. Most are $125 and up. The shorts Baleaf was advertising were around $35. I bit, and I haven't bought any cycling, (or other workout gear.. base layers, t-shirts, compression workout shorts -with a fly! do you know how rare that is?) from anywhere but Baleaf.
The company has grown over the years, to where they're not just another Chinese distributor of cheap, shoddy goods. Take a look at their website and you'll find quality clothing for all of your indoor and outdoor activities- cycling, jogging, aerobics, yoga, running and just relaxing after the workout. Recently they even brought out a line of sustainably produced workout gear. And all at price points that are well below the name brands. Check 'em out.
Oh, you need more inducement to check 'em out? Well, Black Friday and Cyber Monday are approaching, and you just know they're going to have some sweet deals, like-
- Up to 60% off sitewide
- 5% stacked discount if you use the code KTM999 at checkout.
- Get another 20% off if you become a VIP member.
- You might also try code: DanielRGauss (never know, you might get another 10% off)
So, if you're tired of emptying your wallet for a pair of Nike running shorts, or Assos cycling shorts, and if you want to save a whole bunch of the green stuff, check out the Black Friday specials at this link right here!
And watch the old man keep his balance just down there 👇👇
Posts may contain affiliate links. If you make a purchase through one of these, I may receive a small commission at no increased cost to you. Thanks.
Friday, November 18, 2022
Look Sharp. Be Sharp. And Don't Miss The Insane Luminar Neo Black Friday Promo!


I shot this bridge a couple months back. I had thoughts of doing some fancy editing on it. It's old, but still in use, and in its setting, it had a lot of character. We were in a hurry, so I didn't get a chance to take more than this one image. It looked OK on the camera LCD, so we moved on to our intended destination deeper into the Gila National Forest.
When I got around to working on it a week or so later, I was so disappointed to see that the image was very soft.. the result of a tiny bit of camera shake from being in a rush. I set it aside, and set to working on the pictures that I actually took the time to shoot.
Jump ahead a little more than two months, and the Luminar Neo Extension this photo needs is released: SupersharpAI! As the name implies, it uses AI to analyze all the data in the JPEG or Raw file, and figures out where things went wrong, and fixes it! You get options of "Low", "Medium" or "High" sharpness correction. This one was definitely a candidate for "High".
Once I got the resulting sharpened image, I knew I had to reward myself with a total bending of reality. I've shot dozens of images of clouds for just this purpose. In fact, not long before I shot this bridge, at the height of our monsoon season, I shot just the image to use here. And it's easy with Luminar Neo's AI Sky Replacement tool. (While I prefer to use my own skies for this purpose, Luminar has a marketplace full of sky packs, and image presets. It's quite the rabbit hole when you get to searching through it.) So what did I do with this crusty old bridge? Well, wait no further....
 |
| Hot Springs Rd Bridge. ©Daniel Gauss/Shot On Site |
Can you feel the deluge approaching? Should I have added lightning? Easy to do. I'm ecstatic I was able to save this image.
Have you got motion blurred photos in your libraries? Out of focus images. SupersharpAI is for you, (and don't tell me every image you've ever sharp is in perfect focus!).
How about all the other Luminar Neo extensions that have recently been released? Background Removal AI (which I showed you in the previous post), Upscale AI, and Focus Stacking (which I haven't introduced you to, but I'm going to!).
And now, with Black Friday (remember? I promised Black Friday up there 👆👆) on the horizon, you- yes you! Can get Luminar Neo, and all the extensions, plus other bonus goodies at the lowest prices I've seen yet! If I was on the fence about springing for a new editor, this would get me off the fence faster than Humpty Dumpty! And get this: my discount code: DanGauss, will save you an additional $10 off the already low promotional pricing on any package. And here's my advice: Just skip straight to the "Pro Plan". You'll get the most for the least. If you're not the subscribing kind, the second best deal is the Lifetime License. Pay once, and it's yours forever. But just hit this link or click on the ad in the right sidebar👉 and see for yourself. If you've got questions, I'm here!
Black Friday + Cyber Monday promo pricing runs from 11/18 to 11/29/2022
Posts may contain affiliate links. If you make a purchase through one of these, I may receive a small commission at no increased cost to you. Thanks
.png)
Monday, November 14, 2022
Feel Free to Augment Your Reality
 |
| Dogs,2003, and a Bridge, 2021 ©Daniel Gauss/Shot On Site |

The folks at Skylum Software, just released a buttload of new extensions for their Luminar Neo editor. Some practical (I'll get to those in a future post), and some fun and creative. Background Removal AI falls solidly in the latter category. Take the above image for example. If you've got your readers on and can read the small print you'll see the dogs' picture was taken 19 years ago at a dog camp in Asheville. The bridge was shot last Thanksgiving at the Nature Conservancy's Iron Bridge Conservation Area northwest of Silver City, New Mexico.
This screenshot from the Luminar Neo desktop shows the steps (though not in process order) I took to get from there to here... upper right is the original Nikon D1H raw file from 2003. Bottom right is the background removed, with a single click and a bit of fringe work around the ears, Bottom left converted to a png file with a transparent background, where it is then ready to be inserted into another background. Notice that I needed to flip the dogs so the light direction was consistent. Also a single click. Spent about 10 minutes total. Obviously more can be done, but I wanted to get the news out.
.png)
I used a couple of the other new extensions when putting this image together, including NoiselessAI, to remove digital noise in the dog image caused by the small 19 year old Nikon sensor, and UpscaleAI, to increase resolution for the same reason.
If your interest is piqued, hit the links at the top of the post, or the vertical ad on the right sidebar. If you're buying, don't forget to use the discount code: DanGauss to potentially save $10.
Fine print:
Posts may contain affiliate links. If you make a purchase through one of these, I may receive a small commission at no increased cost to you. Thanks.
Friday, November 11, 2022
Luminar Neo Evolution Continues... Better Than Ever
Here's the official tease. I'll have more on the new extensions very, very soon. Or hit the ad on the right.

Sunday, October 30, 2022
Customizing My Old Images. Because I Can
 |
| Cody, Nebraska 2008. ©Daniel Gauss/Shot On Site |

Back in 2008, we embarked on one of our longest trips in the Hare-Brained Express, leaving Ann Arbor, where Margaret's brother installed a new radiator in the Bounder, for the west coast and back again. That trip was chronicled extensively on this blog back then, and you can relive the adventure by clicking on "2008" > "August" in the blog history in the right sidebar. But, if you don't want to go through that, here's the graphic overview...
About a third of the way home, on the northern portion of the loop, we had to hit a small town in the southwest corner of South Dakota to renew our driver licenses, as we were (air quotes) "South Dakota Residents" for purposes of mail delivery, vehicle registrations, voting, etc. When that task was completed we dropped down into Nebraska and stopped for the night in a quaint little town called Cody. The city park there had RV hookups for $5 a night. It also had this view of a beautiful prairie railside grain elevator and water supply. I took lots of pictures. The picture leading off this post has been edited with, you guessed it, Luminar Neo. The original looked like this:

Yeah, a nice tree, but the main subject is the elevator, and the parts of the tree I left frame it perfectly, especially after switching to landscape from portrait. I also dialed up the warmth for a more "golden hour" look.
But, what if we weren't there in August of 2008. What if I wanted you to believe it was, instead, late October of 2008? Using the Landscape and Color tools, and some masking it's easy to bring on an Autumnal look to this image, (can't you just feel the frost in the air?):
 |
| Cody, Nebraska 2008 "Fall Edit" ©Daniel Gauss/Shot On Site |
Lastly, maybe we weren't there at all. Maybe we just saw the image in a photography gallery somewhere. An image by the alternate universe Dan Gauss? Multiverse of Madness, indeed! Well, if it's artsy, it's gotta be black and white, no? More Luminar Neo tools, of course.
 |
| Cody Nebraska 2008 (Black and White Edit) ©Daniel Gauss/Shot On Site |
Give you some ideas? Why not try it soon. The Halloween Special Offer expires soon! And remember my Coupon Code: DANGAUSS to save $10 (not sure if it works with promo prices, but it wouldn't hurt to try!)
Posts may contain affiliate links. If you make a purchase through one of these, I may receive a small commission at no increased cost to you. Thanks.
Saturday, October 29, 2022
It's Great.. To Be.. A Michigan Wolverine! It's Great.. To Be.. A Michigan Wolverine! Etc. Etc.
Also, it's good to be an "Arrogant Ass from Ann Arbor" once again.

See ya next year, "Little Brother".
Oh yeah. My alma mater tightened its hold on the top spot in the NCAA Division II poll... A good weekend all around. Drinks on me!
Just kidding.
About the drinks.
Thursday, October 27, 2022
The Value of An Evolving Editing Program (to me, anyway)
When Luminar Neo first launched last February, it was a very good editing program, but not a great
editing program. It had a lot of useful tools, but it was also missing tools... tools that had been in previous iterations of Luminar: LuminarAI, Luminar4. Gradually, over the next few months, with free updates, improvements and additional tools were added. But the best was yet to come!
Fulfilling the promise to build a fully functional edit platform, to rival the best of the competition, the Luminar team began to drop the first of the "extensions", those being HDR Merge, and NoiselessAI, both of which you've seen on these pages. November will bring 3 more: UpscaleAI (which I teased in a previous post), AI Background Removal, and Focus Stacking.
(The fact that Skylum/Luminar can keep the doors open, and the updates and improvements coming all year long while working in the war zone of Kyiv, Ukraine is nothing short of miraculous!)
But I digress. How do I, Dan Gauss, find the evolving Luminar Neo so gosh darn valuable? Well, you already know I edit nearly every current image with Neo. But I've got literally thousands of old digital images, going back to my days as a sighthound event photographer beginning in 2003. And even thousands more on negatives going back to the very beginnings of Shot On Site Photography in 1994, and beyond!
With every new extension tool, it becomes possible to make nearly every old image in my compendium to look far better than they ever could have looked with the editing tools back in the day. A case in point:
 |
| Race Day Morning.2008 NOTRA Nationals, Boswell OK ©Daniel Gauss/Shot On Site |
This is an image I found yesterday morning while assembling an order for images from this event*. I don't remember taking it, and if I ever saw it back in 2008, I don't remember it. Anyway, I pulled it off the disk and ran it through Luminar NEO. The original wasn't bad, mind you, but it was helped with a few tweaks. I'm looking forward to getting UpscaleAI next month. I'll take this 2MB original JPEG and see what it looks like at 32MB (or bigger?)
So, if you're like me, and have hundreds or thousands of old, small, digital images in need of improvements in color, or exposure, or resolution, you'll want to give Luminar Neo a try. And there's no better time than now to try it (risk free, of course). Special pricing and a bonus gift! Click the ghost in the right hand sidebar, or this link
*Yes, old Shot On Site friends, your old images (from 2003 on) still exist! They're still on my Photoreflect website!, and I still get orders to this day! Not all, mind you, but images from every major lure coursing event, race meet, breed specialty, open field hunt, ASFA II are there. The regular weekend lure coursing and race meets have been removed, but never fear, I still have them on disk. Just email me: dan@shotonsite.us
And remember: if you do order images from "the olde dayes", they will now be edited in the latest and greatest Luminar software!
Posts may contain affiliate links. If you make a purchase through one of these, I may receive a small commission at no increased cost to you. Thanks.
Tuesday, October 18, 2022
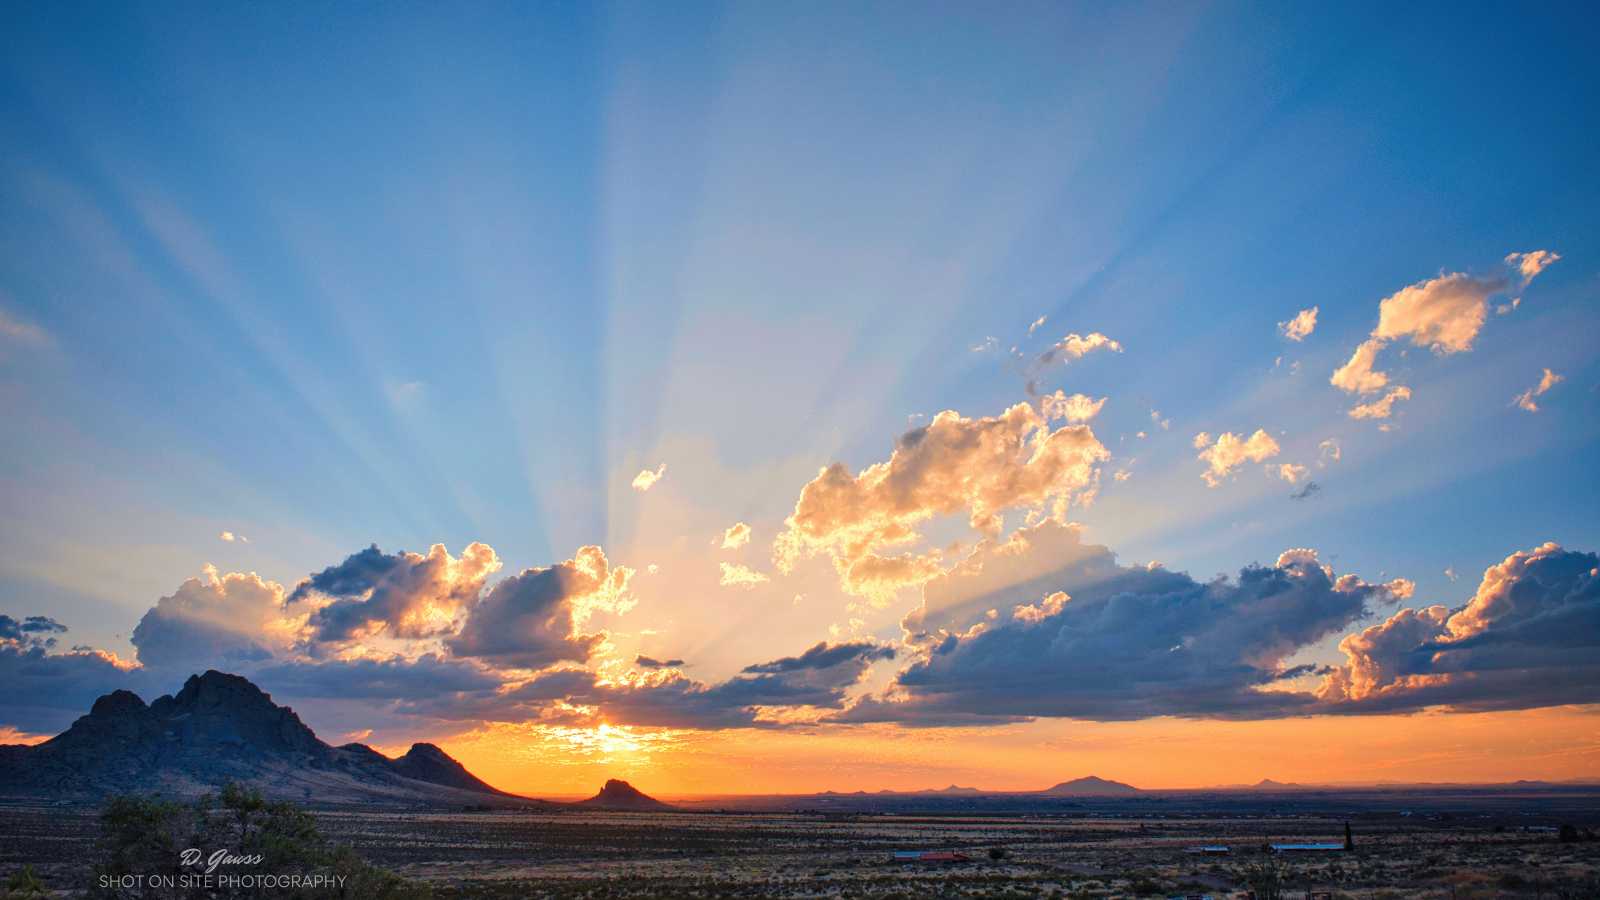
It Was the Mother of All Crepuscular Ray Sunsets
.png) |
| Original Fujifilm X-E3 Raw File: f8, 1/800 second, ISO 400. Fujifilm XF 16-80mm f4.0 R OIS WR zoom at 18mm. |
Last Saturday, I took a break from the recliner in front of whatever college football game I happened to be watching at the time to grab a snack, or refill my water bottle, whatever. Returning to the living room, I glanced out of the open front door and saw this magnificent photo opportunity.
Now, crepuscular rays are not an uncommon site here in The Land of Enchentment, but this was notably exceptional in that the rays were directed out in all directions, owing to the broken cloud formations, and the elevation of the setting sun.
I grabbed the X-E3 and stationed myself on the front porch for the next half hour or so, snapping picture after picture after picture.
I was hoping to get into the editing later that evening, but life - as it does- got in the way, and I didn't get to it until Monday. The screen grab above is the Fuji RAF raw file I started with when I opened up Luminar Neo and sat, staring at the screen, wondering how I wanted to proceed.
I'd watched a YouTube video a couple days before, by a Luminar ambassador, Jim Nix, edit a very similar image, using some of the seldom used tools in Luminar Neo. That's the direction I decided to go.
While Luminar Neo has a very cool "Sunrays" tool, it was obvious it wouldn't be necessary with this image. But I wanted to really accentuate them, along with the golden hour colors. Recently, I would have run this through the HDR Merge tool, just to see what it would look like, but I decided to forego that step. The tools I did use included the almost obligatory DevelopRAW, NoiselessAI, Structure, Color, Super Contrast, among the usual suspects. The seldom used tools included Toning, and Color Harmony.
The beauty of any of the Luminar platforms is that they are completely non destructive. You can experiment with any number of the tools, jack the sliders up to 100, play with colors, vignettes, details, etc. and in the end if you're not happy you can revert to your original raw file or jpeg and it's completely unchanged, and ready for you to start over. I've been there.
Anyway, without further ado, you're probaby interested in seeing how it ended up after using 12 different tools (some more than once, which is another cool feature of Luminar Neo). Here's the shot:
 |
| "From the Porch", ©Daniel Gauss/Shot On Site |
Remember, if you're interested in any of the Luminar products, use the links above, and if you decide to buy, save $10 with my coupon code: DANGAUSS
Till next time.
Posts may contain affiliate links. If you make a purchase through one of these, I may receive a small commission at no increased cost to you. Thanks.
Friday, September 30, 2022
Money Money Money Money..... Money (hum it with me)
Just a quick addendum to yesterday's post on the new Luminar Neo pricing programs. You can take an additional $10 off, using my personal discount code: DanGauss if you purchase a 1 year subscription of either Pro or new Explore! You're welcome.
BONUS POST:
And here's a teaser of an upcoming extension-

Posts may contain affiliate links. If you make a purchase through one of these, I may receive a small commission at no increased cost to you. Thanks.
Thursday, September 29, 2022
News Flash!
 |
| Forest Altar, ©Daniel Gauss/Shot On Site |
I swear, I'll have other product mentions on this blog eventually, but first I have big Luminar Neo news! The folks at Skylum have announced some new levels of pricing, and introduced the Explore Plan. It's a slimmed down version of Luminar Neo at a very attractive price. There is also limited time reduced pricing on the other Luminar plans. If you've been "Luminar-curious", this is your opportunity. Find out all about it at this link.
The above image took about 10 minutes time in Luminar Neo, using just a couple of tools. Below you can see the before/after, from the original Fujifilm RAF (raw) file, to finished image. Impressive.
Posts may contain affiliate links. If you make a purchase through one of these, I may receive a small commission at no increased cost to you. Thanks.
Wednesday, September 14, 2022
Bring da Noize.... outta here.
If you're like me, you have many older images that maybe weren't shot in the most ideal of conditions. Fast action in low light forces you to jack the ISO way up, and that "brings da noize", so to speak. And noting look worse than a noisy photo. Did you know it's possible to eliminate most of that noise with a single click of a mouse? Check this out: (click to play GIF, then make FULL SCREEN)
This is the latest extension tool from Luminar Neo, called NoiselessAI. I intentionally shot this image at the highest ISO my Fujifilm camera was capable of in RAW, 12,800. As you can see, it's annoyingly noisy! If you follow my cursor on the GIF, I simply click on Noiseless in the right column, which opens the tool. The AI then analyzes the image and suggests (you can always disagree!) Low, Medium, or High level of noise removal. In this case, High was the obvious suggestion, and my choice. When done, Neo will display the image at an increased magnification and you can toggle the eyeball to see the before and after. How cool is that?
I should note that in the above example, I didn't use any other Luminar editing tools, only the NoiselessAI. You have, of course, all of the other tools available to make this the best possible finished image. The images below were finished with other tools after the noise was removed.
Below, I'll post a few more before and after images; some using Medium some High, and some Low.
.png)
.png)
 |
| ©Daniel Gauss/Shot On Site |
Next: (before applying NoiselessAI)
 |
| ©Daniel Gauss/Shot On Site |
 |
| ©Daniel Gauss/Shot On Site |
NOTE: Posts may contain affiliate links. If you make a purchase through one of these, I may receive a small commission at no increased cost to you. Thanks.
Monday, September 05, 2022
This On Your Bucket List?
Are you a photographer? Have you ever had a hankering to go to Iceland and capture the mind blowing images available there? What if you could do that in the company of some great photographers. Best of all worlds, right? It's not cheap, but it's available here, with a limited time early bird discount. Check it out!
 |
| ©Sam Kolder |
Br-r-r-r-r-ackets!
 |
| Upper Gallinas Campground, Gila National Forest. New Mexico, USA ©Daniel Gauss/Shot On Site |
I rarely go out with the express intention of only shooting bracketed exposures. It's been 10 years, in fact. On this one day road trip up to the Black Range in the Gila, it was my main purpose. I wanted to try out the new HDR Merge extension for Luminar Neo with multiple exposures. In the previous post, I tried out its "single image HDR" capabilities with great success. This image was made up of 5 images, each 1 stop of exposure apart; an average exposure, and +1, +2, -1, -2. I used several other Luminar Neo tools to complete the image, including layers, sunrays, and atmosphere. Gotta say, it looks nothing like an image from the early days of HDR. No "clown vomit" here!
Subscribe to:
Posts (Atom)